Tuesday, 25 May 2010
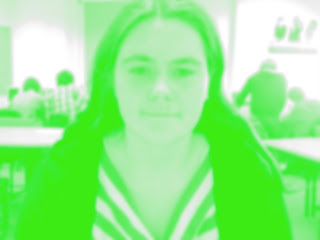
my green warhol
Creating this warhol is very simple. First of all take an image of yourself and put it into Photoshop. go to image>mode>grayscale. Then select the layer adjustment tool. Then go to brightness/contrast and change brightness to 25 and contrast to 55. Next go to image>mode>rgb, create a duplicate image and blur the image to 3 or 4. Next still on the duplicte layer change the lighting to soft light. Create a new layer on top of the duplicate layer and fill with any solid colour. Then select the colour layer and select lighten.
Thursday, 20 May 2010
my warhol
I started off by finding a picture of me and putting it in Photoshop. I then deleted the original background and added in a solid colour. You then have to blur the image. To do this go to filter>blur>smart blur. I suggest you set the radius to about 40 and set the threshold to around 15. then click okay. If you are happy with how blurry it is then delete the back up layer. Then create a duplicate layer of the blurred photo. click on the blurred photo layer, go to filter>artistic>cutout. It is best to set the level at about 3, I then set the edge simplicity to 1 but you could set it to 2 but no higher. Then set the fidelity to 1. If you wish to chance the contrast then go to image>adjustments>brightness contrast. Click on use legacy at the lower right of the box. To burn and dodge use the burn tool in the toolbar to add darkness to any shadows. Use the dodge tool to add any highlights.
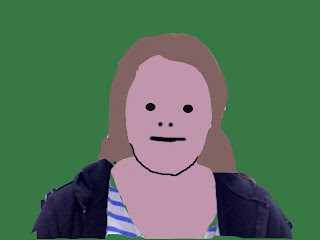
my opie
To create an Opie follow these steps:
- Start my making a new image. File>New
- Open your source image. Select the part of the photo you want using the marquee selection tool. Edit > Copy. Click on your empty picture you just made. Edit > Paste
-
You will probably now need to resize the photo in your picture.
-
Create a new layer and call it 'Hair'. Layer > New > Layer. Name the layer hair in the pop up window.
-
Use the lasso tool to trace around your hair.
-
Now use the colour palette to select a suitable colour for you hair. Then using the Paint Bucket Tool fill your hair.
-
Make a new layer called Face and use the Lasso tool to draw around your face. You do not have to be accurate on parts of your face covered my hair. But take your time to trace your chin accurately. Then fill in your face with a suitable colour.
-
Now make a new layer called 'features'. Using the pencil tool set to a large size click on 2 eyes. Make the pencil the right size for the eyes by moving the Master Diameter slider up and down. Remember to put the white dot in.
-
Stay on the 'features' layer. Use the lasso tool to trace one eyebrow. Hold down the Shift Key and trace the other eyebrow. Smooth your selection. Fill the black with the Paint Bucket Tool.
- Use the paint or pencil tool to add your nostrils and mouth. Or you can use the lasso tool to draw trace your nostrils and your mouth. Fill in these selections.
-
Now add your neck and ears. Make new layers, one for your ears and one for your neck. Use the lasso tool to trace them, then fill them. You can also add a stroke for them. I have also drawn some black lines on the ears using the pencil tool.
- Your clothes are made in the same way.
- Finally make one last layer. Move it to the back in the layer order window and fill it a colour.